The environment setting of Quadcept can be initialized and the backup of data such as components or drawing sheets can be acquired / restored on the "Data" tab. This tab also allows you to clean up a Quadcept database as well as export all the Quadcept projects created in v9 or earlier in v10 format from the database.
These operations cannot be performed when Quadcept is running. Perform them after closing Quadcept.
Login is necessary on the "Data" tab in order to use each function.
Initialization of Environment Setting
The following will explain how to initialize environment settings.
The environment settings include customization information such as workspace, ribbon and the assignments of shortcut keys and the settings such as language settings. |
| (1) |
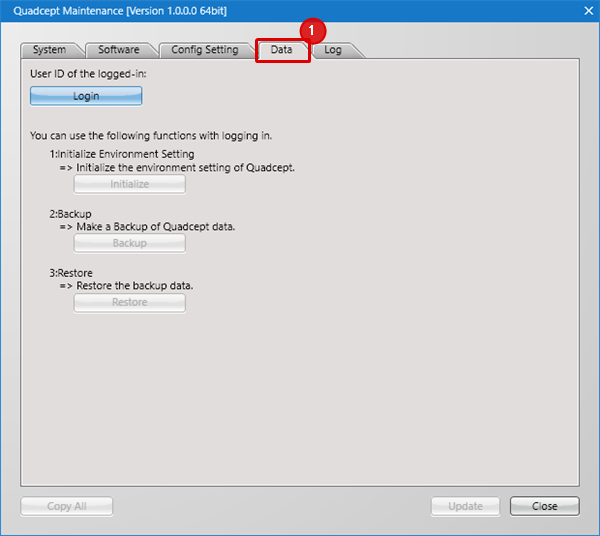
Start "Quadcept Maintenance" and then select the "Data" tab. |
| * |
Each function is displayed in a state of gray-out.
[Login] is necessary on the "Data" tab in order to use each function. |
|
 |
| (2) |
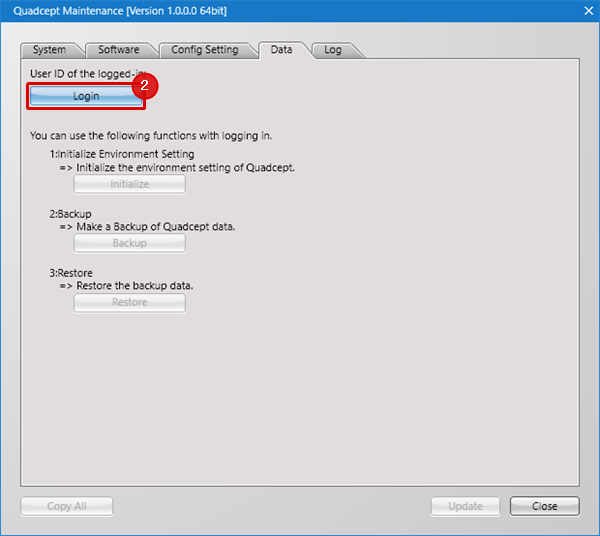
Log in Quadcept by selecting [Login]. |
| * |
It might take some time to log in Quadcept. |
|
 |
| (3) |
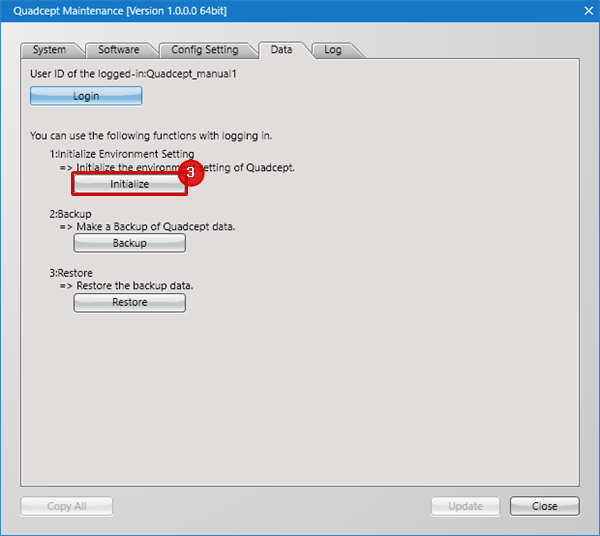
Initialize the settings by pressing [Initialize]. |
| * |
The environment settings of the user ID used for the login on (2) is initialized and the ones of the other users are not affected even when using the same PC because they are managed on a per-user basis. |
|
 |
Backup
The following will explain how to acquire backup data.
All the data such as projects and components(except for environment settings) can be acquired as backup from the [Data] tab. |
| (1) |
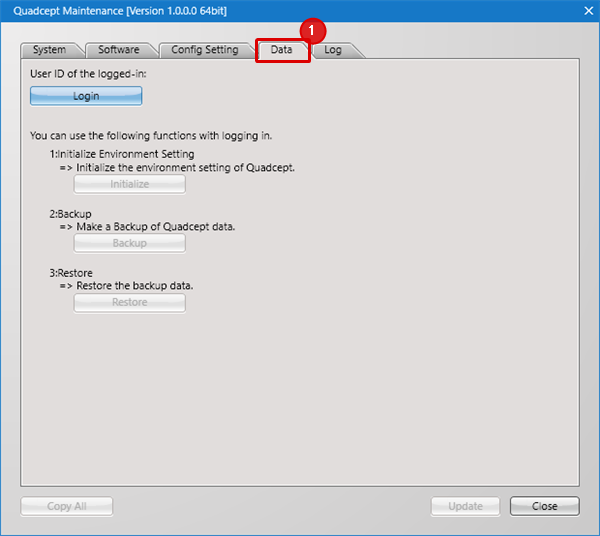
Start "Quadcept Maintenance" and then select the "Data" tab. |
| * |
Each function is displayed in a state of gray-out.
[Login] is necessary on the "Data" tab in order to use each function. |
|
 |
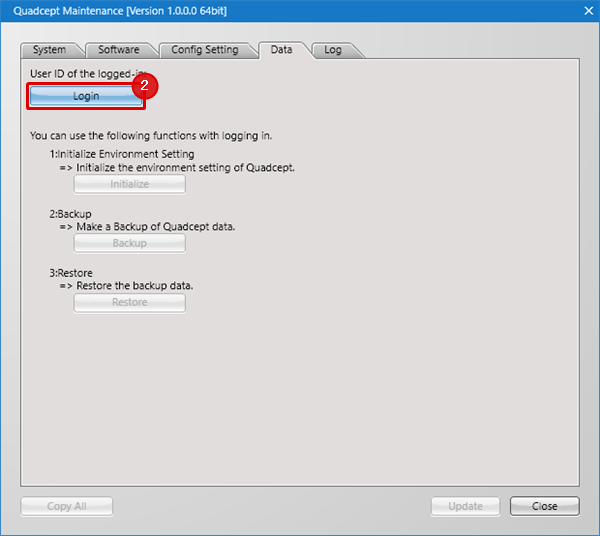
| (2) |
Log in Quadcept by selecting [Login]. |
| * |
It might take some time to log in Quadcept. |
|
 |
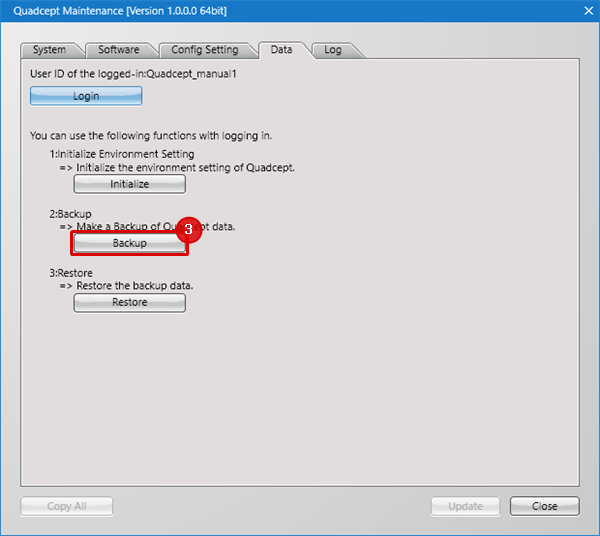
| (3) |
After pressing [Backup], save backup data(zip) by specifying a destination to save and entering a file name. |
| * |
The data of the user ID used for the login on (2) is acquired as backup data because all the data is managed on a per-user basis. |
| * |
It might take some time to back up the data. |
|
 |
Backup Restoration
The following will explain how to restore backup data.
The backup data(zip) acquired from the "Data" tab can be restored on the same tab. |
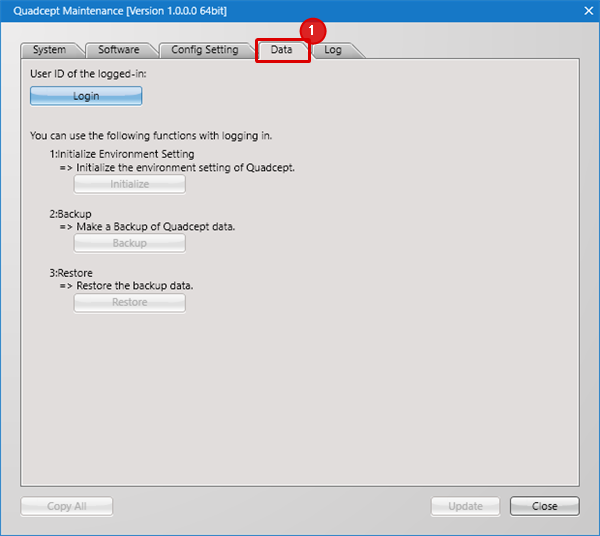
| (1) |
Start "Quadcept Maintenance" and then select the "Data" tab. |
| * |
Each function is displayed in a state of gray-out.
[Login] is necessary on the "Data" tab in order to use each function. |
|
 |
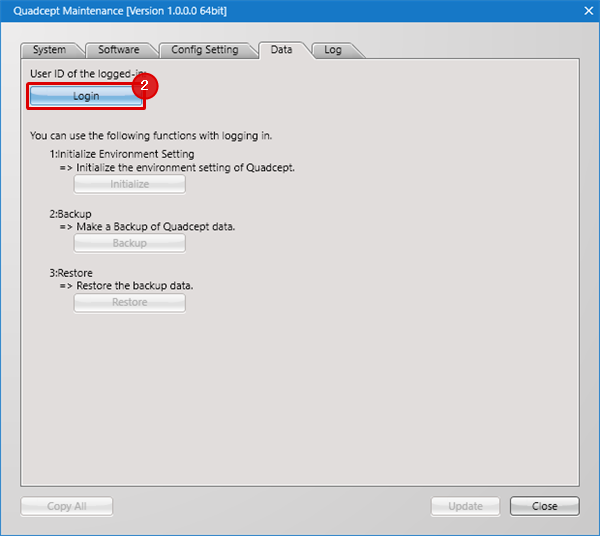
| (2) |
Log in Quadcept by selecting [Login]. |
| * |
It might take some time to log in Quadcept. |
|
 |
| (3) |
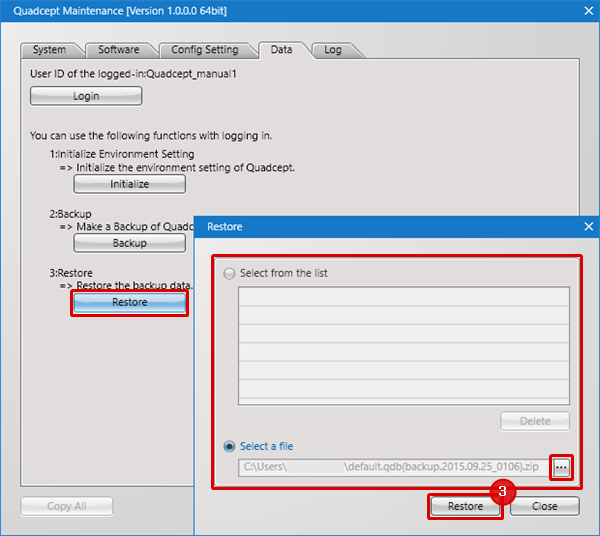
After pressing [Restore], select a file(zip) to restore on the opened "Restore" window and run [Restore]. |
| * |
The backup data(zip) made by [Backup] is displayed in the "Select from the list".
If the data you want to restore exists on this list, click on a radio button of "Select from the list" and select the data. |
| * |
If you want to select a file freely, click on a radio button of "Select a file", press […] on the right edge and select a file. |
|
 |
| (4) |
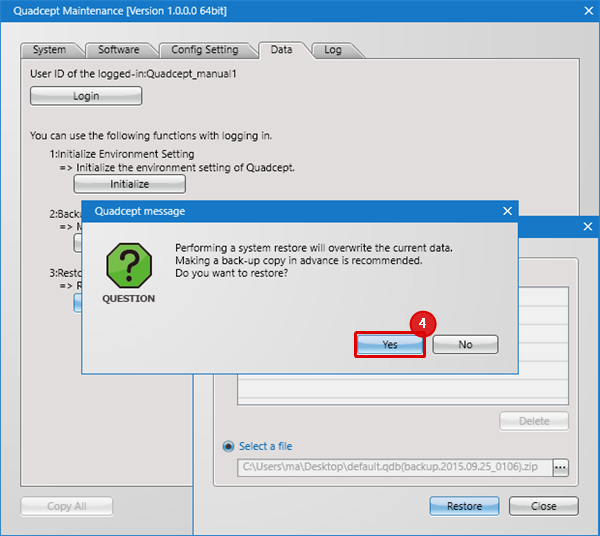
The Quadcept message indicating that the current data will be overwritten will appear for confirmation when running [Restore]. If there is no problem with it, perform the restoration of backup data by selecting [Yes]. |
| * |
It might take some time to restore backup data. |
|
 |
| (3) |
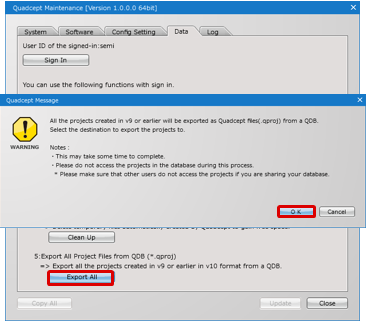
Selecting "Export All" will show a dialog entitled "Quadcept Message". Click "OK" to run. |
| * |
Please do not access your database during this process. If you are sharing your database with other users, please make sure that they do not access the database. |
| * |
This may take some time to complete. |
|
 |
| (4) |
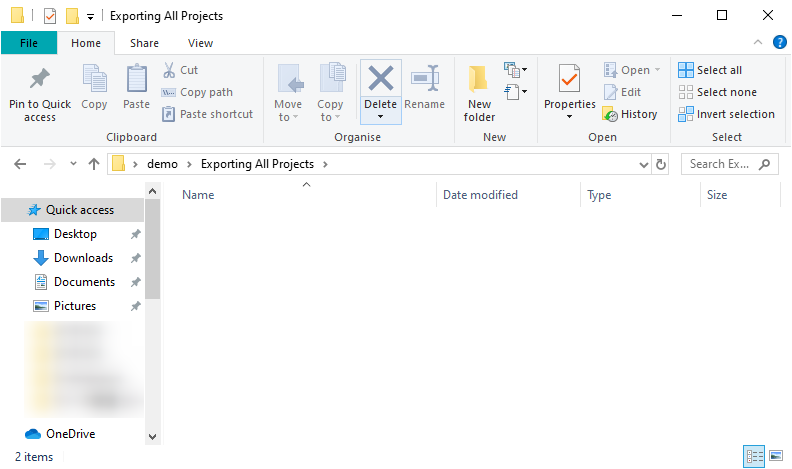
Select a folder to save project files to and then click "OK" to run. |
|
 |
| (5) |
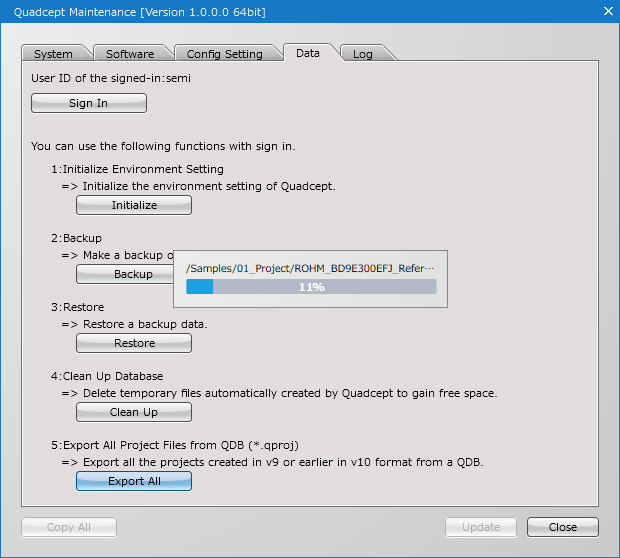
All the projects will be exported to the specified folder. |
|
 |
| (6) |
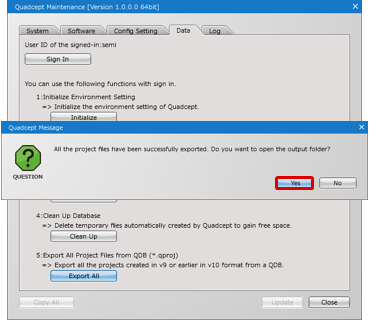
After the export has been completed, a completion message will appear. Click "Yes" if you wish to open the export destination folder. |
|
 |
| (7) |
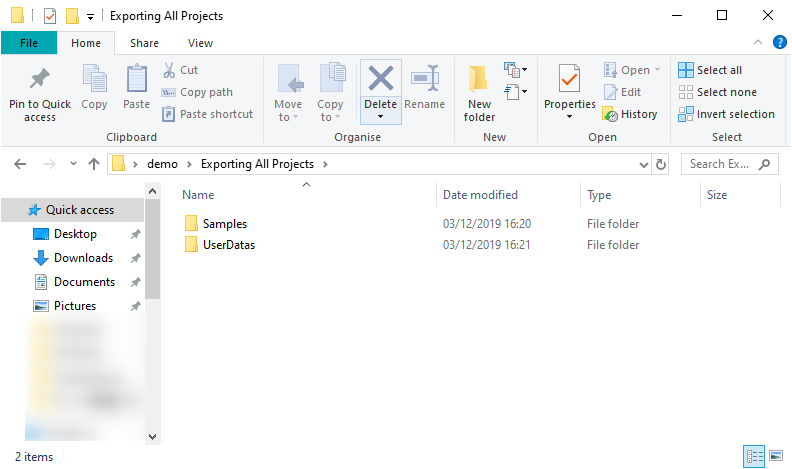
When clicking "Yes", the export destination folder will be opened. |
| * |
The directory structure built in your QDB will also be created in the export destination folder. |
|
 |


